
So what does it take to create a perfect, usable object in 3D? I'll tell you! It takes a hell of a lot of work!
What you see above is the sculpture nearing its completion in Zbrush, but what looks like a finished product is often only the beginning. While it may be aesthetically pleasing and produce a fine artistic result, in its current form it is still not able to be used in actual production.
In the picture above, the object is made up of several million polygons. The trick is how to get it down to just a few hundred polygons while allowing it to retain the shape, and allowing it to keep the same amount of detail you see above.
So lets go back to the beginning. How does any successful work of art begin? With reference!
In The Beginning:
I knew from the beginning that I wanted to create a realistic and detailed arm that could be usable in production. To begin sculpting, I would need to have as much reference as possible to keep me on top of things. Now I could have used my own bulging muscles as reference, just glanced down at my gleaming, mountainous biceps every couple of minutes or so, and sculpted accordingly... But I decided to take it a step further, to go above and beyond, and search for reference beyond my own tendinous plateaus.I went to the wondrous place called the internet and searched for images pertaining to the object I desired to create.
First I looked for muscular arm reference and gathered the photos I knew would be the most useful to me.
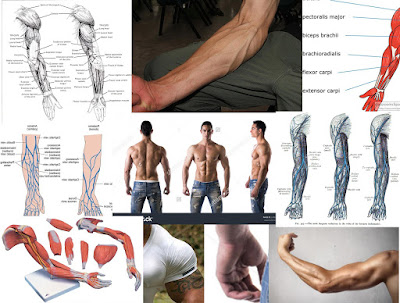
I knew I would have to work based on both photo reference and material that described the muscles and veins beneath the skin as well. When working on a successful model, you cannot just model what you see on the surface, but you constantly have to imagine what is underneath. You have to know what is underneath. Being able to have a comprehensive understanding of both the inside and outside of the subject you are creating will allow you to create characters, creatures, and objects that have more than just a surface level feeling to them. We are imitating life, and life is no surface level expedition. To truly live is to see and experience things to their core! So while we ultimately are creating surfaces, we must always model as though our created objects have depth, substance, and a core. You must believe that more lies beneath, or your audience never will.
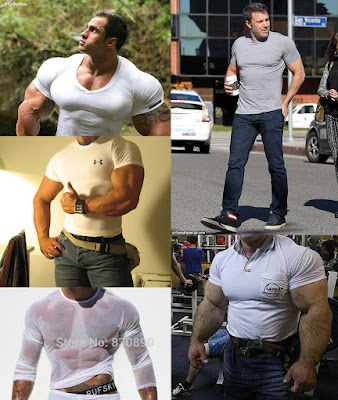
After collecting reference images for the arm and muscles, I searched for images pertaining to cloth and shirts, because I knew that my arm was going to have a sleeve on it as well.
Disclaimer: [While many of these photos found were needlessly sexual and looked like advertisements for succulent human hamburgers, I assure you that all I searched for was "muscular men wearing tight shirts"...] And let me assure you, in cases like this, Google's Safe Search option is a Godsend.
Sculpting:
So now it is time to start sculpting! I decided to use the image in the center of the Muscle Reference Collage above for my main muscle reference.I imported the image into Zbrush and began working.
I started with ZSpheres, which make blocking out an object extremely quick and easy. While I had used Pixologic's Sculptris software in the past, I had never touched Zbrush. So while I was familiar with 3D sculpting and the process, getting used to the Zbrush interface did take some time. Once I had it down though, ZSpheres were extremely efficient and easy to work with.
I used ZSpheres to sculpt the base from the shoulder down to the wrist. In retrospect, I wish I would have used the ZSpheres to form the hands as well, as I formed the hands using just the basic tools in Zbrush and did them entirely from scratch. Getting the hands and fingers correct took me the longest because of the way I chose to work. I know now that in the future, I should block them out with the rest of the arm as well rather than trying to add them in later.
After getting the basic shape of the arm using Zspheres, I began using Dynamesh to sculpt out the shapes a little bit more (based on the reference) and then pulled out the hands and fingers and continued Dynameshing to keep the density of the topology even.
After hours of working, I eventually ended up with something that looked like this!
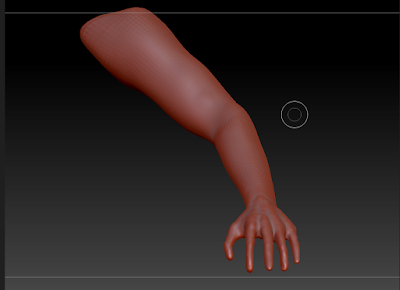
Nice, right?! Finished?! ... Not even close!
As you can see here, I have a pretty basic arm with a hand that has a little more detail than it probably even should at this stage. But that's okay! The hand looks very boney at this point, which helps me imagine the bone structure beneath. Later on, I will be able to add muscles over top of that bone in a realistic way.
At this point, I have very basic details. Beforehand I had broken the arm down into different major pieces to help me think of how I would create it. The edge flow when resurfacing would need to follow the gaps in between the blue pieces. I marked where the finger joints would be with red circles. This wasn't extremely necessary, but just something I did really quickly to help me get the idea of the Primary Form.
Then I wanted to study the object a little bit more, so I took note of the Secondary details such as the muscles and joints. I needed a good idea of where they all existed before I could begin creating them, so I mapped them out.
In addition to all this, I would focus on the Tertiary details; the smaller things like wrinkles, nails, veins, etc. After sculpting out the Primary and Secondary Details, I would add the Tertiary. In many things in life, you start small and work your way up. In art, you do exactly the opposite! Start with the big and work your way down to the small.
After Hours of Sculpting Later:
I added detail to the arm, gave it veins, carved wrinkles into the skin, gave it a skin-like texture, and made it as lifelike as possible. After some extra work, I had made a sleeve as well. My arm had gone from very basic to very detailed. Below is the same arm, once before I had even begun working on the Secondary Details, and the other is when it was completed with both Secondary and Tertiary Details. As you can see, there are some major differences.
As we know, these objects are made up many tiny little shapes. So what does the mesh actually look like? Well let me show you!
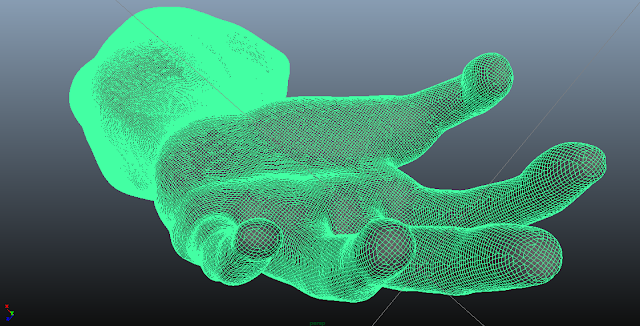
Yes, ladies and gentlemen, this arm (sleeve not even included) is currently made up of 1.3 million tiny tris. And this is the version saved at a lower resolution than the original.
Obviously, something like this can't be rigged or animated, so we have to make it able to be rigged and animated!
This is how we do that!
The Magic of Resurfacing:
After this, I had to retopologize the entire thing. Basically, by going in and rebuilding the object using geometry that computers can actually handle. An artist will use a number of tools to accomplish this, and it takes many hours and a lot of concentration.Basically, he will redraw over the object, how the shapes SHOULD look. So instead of millions of tiny triangles, we will end up with several hundred organized squares!
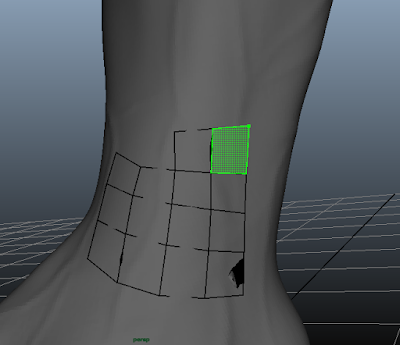
Eventually, we end up with this!
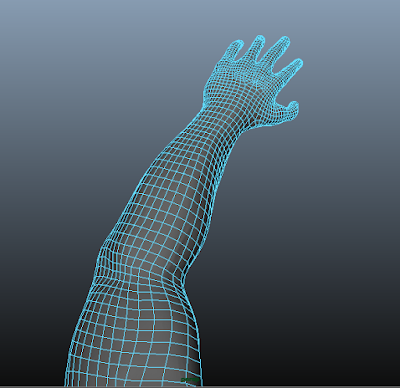
An arm that holds the exact same basic shape, but does not have any of the major details that the other one did.
Now we have to give this arm the illusion of having the same amount of geometry and detail that the complicated one did.
We do this by baking normals from the high resolution object onto the object that has a lower resolution.
Before we can bake normals onto an object, we have to lay out the UV's.
UV's are basically like... maps. You know how the globe is round and has coordinates, yet we take those coordinates and images and make them into flat maps. When you lay out UV's, you are essentially taking a globe and turning it into a piece of paper while keeping the details and information in tact.
When the UV's are done being laid out, (and these ones are very messy, so don't judge me too hardlybased on this), they will look something like this:
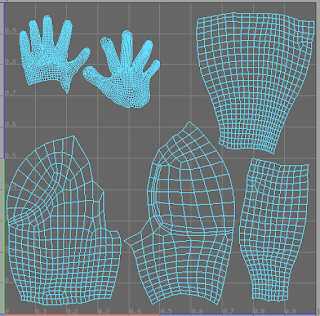
So there! It's basically a map split into pieces that holds the coordinates of the arm!
So if I were to put an image of a smiley face beneath the palm of the hand, a smiley face would appear on the palm of the hand of the actual model.
So what I want to do now is take all of the information of the high resolution model, stretch it out, and project it onto the UV's. (This is essentially what baking a 3D object does)
When you bake an object, you end up with the "Normals." The normals hold information from the high resolution object that will be projected onto the low resolution object to give it the illusion of complexity and detail.
The normals look like this:
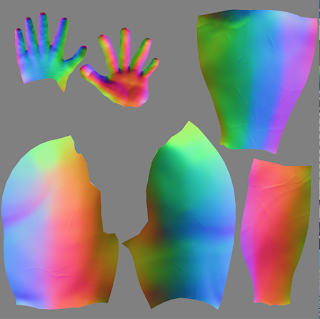

Once everything has been pieced together, an object that actually looks like this:
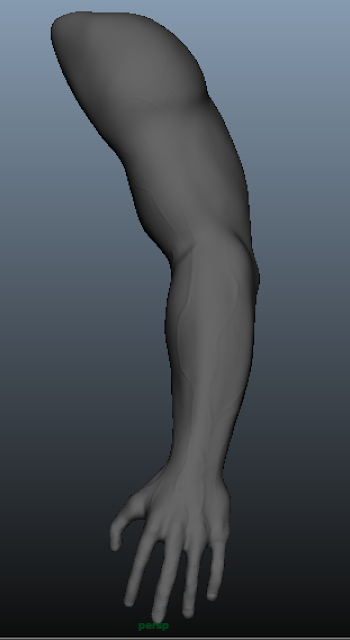
Now has the illusion of being as detailed as this:
When in reality, it only looks like this:
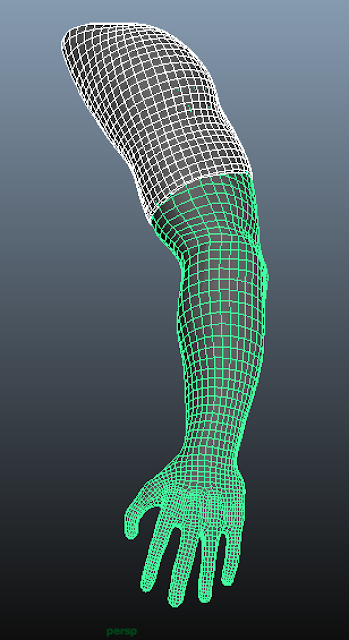
And the final product looks THIS pretty:
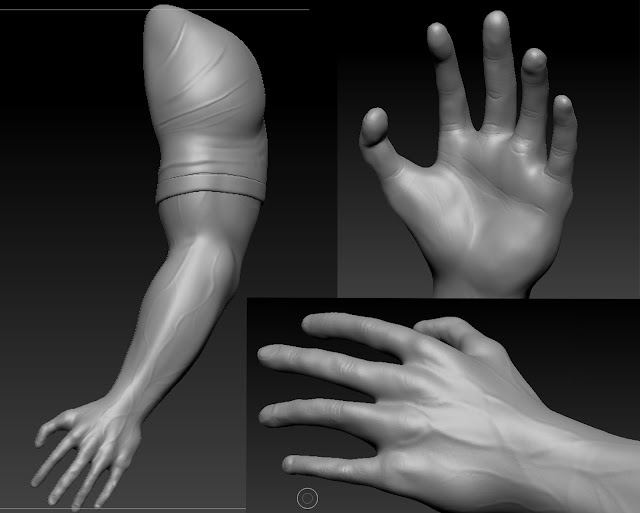
And it can now actually be used by riggers and animators to make beautiful masterpieces for years to come! (Or probably just for the next week)
It's Nowhere Close to Perfect:
I'll be honest with myself and say that this is nowhere close to perfect.
If I didn't have a deadline, didn't have a sometimes full-time Job with the biggest entertainment company in the world, and if I had the ability to put into this project what it deserves:
The edge flow would be better, the anatomy would be better, the level of detail, the UV's, the final product would have been better. But the important thing is that I completed it and I learned.
I learned how to make sacrifices and how to keep focus in the areas that need it while working under a tight time frame.
I learned that skimping in the beginning makes things harder on you later on, so even when working on a base mesh, work on it with passion and attentiveness!
I learned that there are a thousand different ways to bake normals, and only one way is ever actually right.
I learned that hard work pays off.
I learned many things.
But I think that the thing that most affected me was this: When I tried to think about all the technical aspects 100% of the time, I only drove myself crazy and got absolutely nowhere. But when I stepped back, took a breather, turned on some music and began creating this as an expression of myself, it became easy and like a breeze.
Any time an artist separates himself from his art, he struggles.
I took a moment to write down my feelings in the middle of this process at one point, and I'm glad that I did. I wrote:
Every artist must struggle until he realizes the pinnacle of creativity; of true discovery and success, lies not in his ability to conquer or to pin down his art form, but in his ability to feel what exists within himself. Art is about seeing, but not with our eyes. It is about seeing beyond the skin of reality and being able to create things not just surface level, but knowing them to the core. Most importantly, you must know yourself. The less spiritual an art form becomes to you, the more you will struggle in the act of doing it. When you let your art become a living, breathing thing in your heart and imagination, there is no limit to how far you can go in reality. This goes for all things worth doing in life.
Those words carried me through this entire process and made it possible.
I hope that every artistic experience I have becomes a learning process for me. If I am creating something new, I am learning, and that is part of what drew me to art to begin with.
-Britain V.
02/02/2016


